By Rohan Easterbrook Fact-checked by Hugo Lindgren Published
Flappy Bird reportedly earned about $50,000 a day from ads before its creator pulled it in 2014, yet the whole game rests on four rules you can rebuild in Scratch in under an hour. To make Flappy Bird in Scratch, you need three things. A velocity variable pulls the bird down, and each flap resets that velocity upward. Cloned pipe pairs slide left with a random gap. A score counts each pipe once and survives restarts.
Key takeaways
- Gravity should be acceleration: change a y velocity variable every frame, then move the bird by it.
- A flap sets the velocity to a fixed number. It does not add a jump, and holding the key must not keep you flying.
- Pipes work best as hidden-parent clones that delete themselves off-screen, which keeps you far below the roughly 300-clone limit.
- Give each pipe clone a “scored” flag so the score goes up exactly once per pipe.
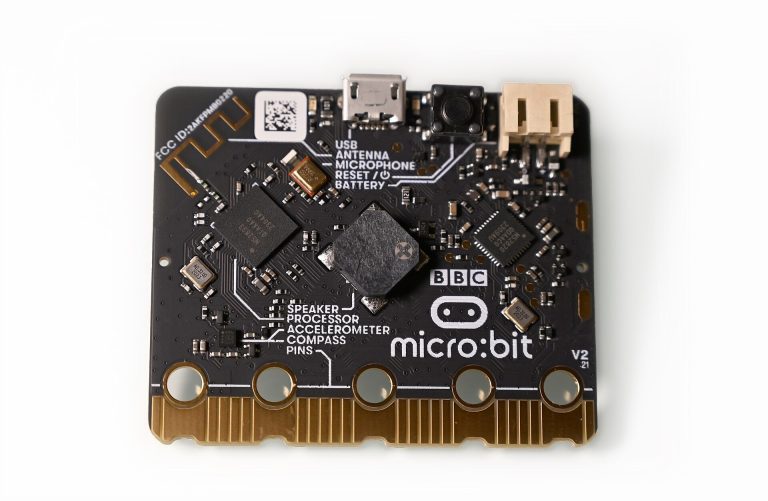
- A Makey Makey or BBC micro:bit can stand in for the space bar as a physical flap button.
Fact-checked
We checked these key facts against the sources named, on November 12, 2026:
- X runs from -240 to 240 and y from -180 to 180 (source: scratch.mit.edu)
- The Scratch stage is 480 pixels wide and 360 tall (source: scratch.mit.edu)
- Clones never delete, or old rounds’ clones pile up until the ~300 cap (source: scratch.mit.edu)
- The Flappy Bird Foundation relaunched it on Android through the Epic Games Store in April 2025, and Dong Nguyen told Engadget, “I did not sell anything.” (source: engadget.com)
- The Stage uses
broadcast (clear pipes) and waitbefore starting the round. “And wait” makes sure every old clone has deleted itself before the bird reappears at x = -100 (source: scratch.mit.edu)
Flappy Bird in Scratch: play it, remix it, or build it
You have three routes. You can play a version someone has shared, remix one, or build your own from a blank project. Building your own is the only route that teaches you why the game works, and it takes about an hour if you follow the steps below.
Play a finished version first
Go to scratch.mit.edu and search “flappy bird”. You’ll find hundreds of shared versions of very mixed quality. Most have no instructions. Click See inside on any project to read its code, or Remix to save your own copy, which needs a free account. Playing one for two minutes before you build gives you a feel for how fast the bird should fall.
What you’ll build (feature checklist)
- A Parrot that flaps its wings, tilts up when it rises and nose-dives when it falls
- Gravity that speeds up as you fall, with a top falling speed
- One flap per press of the space bar or mouse button, so holding the key doesn’t turn the bird into a jetpack
- An endless stream of pipe pairs with a random gap
- A score that rises by exactly 1 per pipe, plus a high score
- A game-over screen and restart without clicking the green flag
- Pipes that speed up and gaps that shrink as your score climbs
Along the way you’ll learn variables, velocity, clones, broadcasts and game states. Those concepts carry over to almost every Scratch game.
What you need
You need a computer with a modern browser, or the free Scratch app for Windows, macOS, ChromeOS or Android. An account is optional. Without one, you can click Create and build straight away, but you can only save with File > Save to your computer. Sharing, remixing and cloud saves need a free Scratch account.
Did you know?
The Flappy Bird that came back in 2025 was made without its creator. The Flappy Bird Foundation relaunched it on Android through the Epic Games Store in April 2025, and Dong Nguyen told Engadget, “I did not sell anything.”
Some quick history explains why so many people clone this game. Dong Nguyen released Flappy Bird under his studio name, .Gears (legally DotGears Company Limited), and removed it from app stores on February 10, 2014. The 2025 relaunch came from The Flappy Bird Foundation after Gametech Holdings acquired the trademark, and it added a new Quest Mode. Your Scratch version is a fan recreation, so give it your own art and name rather than copying the original’s graphics.
How Flappy Bird physics works (and why most tutorials feel wrong)
Flappy Bird feels right because the bird accelerates downward and every tap snaps it upward at the same speed. Most Scratch tutorials skip the acceleration, so their bird drops at a constant, stuttering rate. Fixing that takes one variable.
First, the numbers you’ll work with. The Scratch stage is 480 pixels wide and 360 tall. X runs from -240 to 240 and y from -180 to 180. Scratch also runs projects at 30 frames per second by default, so a forever or repeat until loop without waits runs about 30 times a second. Every value in this guide is “per frame”, so a pipe speed of 4 means 120 pixels per second.
Gravity is acceleration, not a fixed fall
Real gravity changes your speed, not just your position. In Scratch you store the bird’s vertical speed in a variable called y velocity. Each frame you make it slightly more negative, then move the bird by it.
Here is a worked example with gravity at -1 and a falling-speed cap of -12. After 1 frame, the bird moves down 1 pixel. After 5 frames, it moves 5 pixels per frame. From frame 12 onward, it falls at the cap of 12 pixels per frame, or 360 pixels per second. Starting from rest, it drops about 114 pixels in half a second. Notice the slow start and the fast finish, just like the original.
Compare that with the method CodeWizardsHQ’s tutorial uses: wait 0.1 seconds then change y by -15. That moves the bird 150 pixels per second at a constant rate. It also only updates 10 times a second, while the screen redraws 30 times, so the fall looks choppy.
A flap sets velocity, it doesn’t teleport
A flap should replace the current velocity with a fixed upward value, such as 8. It should not add to it, and it should not jump the bird up a set distance. Setting the value means every flap feels identical, even if you’re falling fast. With flap strength 8 and gravity -1, the bird rises about 36 pixels over roughly a quarter of a second and then arcs back down.
Create & Learn’s version moves the bird up 20 pixels per frame while space is held and down 5 otherwise. Holding space therefore makes the bird climb forever. Scratch users who post “holding space makes the bird fly up forever” have run into exactly this.
| Method | Gravity approach | Flap input | Pipes | Score | Feels like the original? |
|---|---|---|---|---|---|
| Fixed fall (wait 0.1, change y by -15) | Constant speed, 10 updates a second | when space key pressed hat block, affected by keyboard auto-repeat delay |
One sprite that loops back | Basic or none | No: no acceleration, choppy |
| Hold-to-rise (+20 up, -5 down) | Constant speed | Holding key space pressed? |
One sprite | Basic | No: works like a jetpack |
| Remix of a shared project | Varies | Varies | Varies | Varies | Sometimes, but nothing is explained |
| Velocity + clones (this guide) | Speed changes every frame, with a cap | One flap per press, space or mouse | Endless clones that delete themselves | Once per pipe, plus a high score | Yes |
Scratch’s best-known tutorial author, griffpatch, uses the same speed-variable idea in his platformer tutorials. Once you understand it here, those projects become much easier to read.
Step 1: Set up the stage and the bird
Start a new project, delete the Cat, add the Blue Sky backdrop, and add the Parrot sprite from the Animals category. Set the Parrot’s size to 35 so it fits through a gap. The Parrot has two costumes, parrot-a and parrot-b, which you’ll use for the wing animation.
Build steps
- Click File > New, then right-click the Cat sprite and choose delete.
- Click Choose a Backdrop, search “Blue Sky” and add it.
- Click Choose a Sprite and add Parrot.
- In the sprite panel, set Size to 35 and rename the sprite “Bird”.
- Create variables for all sprites: score, high score, game state, gravity, flap strength, pipe speed.
- Select Bird, then create a variable “y velocity” with “For this sprite only” ticked.
Anything from 25 to 50 percent works for the size. Create & Learn uses 30. At 35, the Parrot fits comfortably through a 140-pixel gap while still leaving room for mistakes.
Centre the costume
Open the Costumes tab and check that each Parrot costume sits on the centre of the canvas. If the drawing is off-centre, select all of it and drag it until it snaps to the centre point. Do this for both costumes.
The centre matters for two reasons. The bird rotates around the costume centre, so an off-centre drawing swings outward when it tilts. And if parrot-a and parrot-b have different centres, the bird jumps a few pixels every time it flaps. Both problems produce the classic complaint that the “bird dies when it isn’t even touching the pipe”.
Maker tip
Zoom into the costume and delete any stray pixels or faint outlines. Scratch checks collisions against the actual drawn pixels, so a forgotten speck on the costume can end your game.
Animate the wings
The wing flap is a simple costume loop: next costume, wait 0.15 seconds, repeat. Run it in its own script so the timing never interferes with the physics. The full script is in the code section below.
Step 2: Gravity and the flap
The bird needs two scripts: a physics loop that runs every frame and a separate input script that waits for presses. Keep them apart. If the physics loop paused to wait for a key release, gravity would freeze while you held the key.
Script: bird physics loop
The loop does six things every frame. It adds gravity to the velocity, caps the fall speed, moves the bird, stops it at the ceiling, tilts it, and checks for a crash.
when I receive [start game v]
show
go to [front v] layer
set size to (35) %
set rotation style [all around v]
point in direction (90)
go to x: (-100) y: (0)
set [y velocity v] to (flap strength)
repeat until <(game state) = [over]>
  change [y velocity v] by (gravity)
  if <(y velocity) < (-12)> then
    set [y velocity v] to (-12)
  end
  change y by (y velocity)
  if <(y position) > (170)> then
    set y to (170)
    set [y velocity v] to (0)
  end
  point in direction ((90) - ((y velocity) * (3)))
  if <<touching (Pipe v)?> or <(y position) < (-165)>> then
    set [game state v] to [over]
    broadcast (game over v)
  end
end
The tilt formula turns velocity into an angle. At a velocity of 8 (just after a flap), the bird points at 66 degrees, slightly nose-up. At the -12 cap, it points at 126 degrees, nose-down. Starting with y velocity set to flap strength gives the bird a small hop when each round begins.
Script: flap without hold-to-fly
This script waits for a press, sets the velocity once, then waits for the release. One press always gives exactly one flap.
when I receive [start game v]
wait until <not <<key (space v) pressed?> or <mouse down?>>>
repeat until <(game state) = [over]>
  wait until <<key (space v) pressed?> or <mouse down?>>
  if <(game state) = [playing]> then
    set [y velocity v] to (flap strength)
    start sound (Pop v)
  end
  wait until <not <<key (space v) pressed?> or <mouse down?>>>
end
Add the Pop sound from the sound library first, or swap in any sound you like. The first wait until not line stops the press that restarted the game from also counting as a flap.
Maker tip
Use the Sensing block “key space pressed?” in a loop instead of the “when space key pressed” hat. The hat follows your keyboard’s auto-repeat, so it lags when you hold the key. A “wait until not key space pressed?” after each flap gives one clean flap per tap.
Tuning table: gravity vs. flap strength
Change these values in the Stage’s green-flag script. If you change gravity, adjust the flap strength too, so the jump height stays around 30 to 35 pixels.
| Setting | Easy | Classic | Hard | What it changes |
|---|---|---|---|---|
| gravity | -0.8 | -1 | -1.2 | How quickly the bird speeds up as it falls |
| flap strength | 7 | 8 | 9 | How fast each flap launches the bird upward |
| Max fall speed | -10 | -12 | -14 | The fastest the bird can drop, in pixels per frame |
| Starting pipe speed | 3 | 4 | 5 | How fast pipes scroll left |
| Pipe gap (costume) | 150 px | 140 px | 120 px | How much room you have to fly through |
If you’re asking what values to use because your “bird falls way too fast” or “jumps too high”, start from the Classic column. Then change one number at a time and play three rounds between changes.
Step 3: Endless pipes with clones
Endless pipes come from a single hidden Pipe sprite that creates a clone every second or two. Each clone appears at the right edge with a random height, slides left and deletes itself near the left edge. Only clones are ever visible.
Draw the pipe pair in the paint editor
Use one costume with both pipes in it: a top pipe and a bottom pipe with a fixed gap between them. Centre the gap on the canvas, because the clone’s random y position moves the gap’s centre. Pick Paint to make a new sprite and name it “Pipe”. In Vector mode, draw two green rectangles about 60 pixels wide and 220 pixels tall, one above and one below the centre.
At 100 percent zoom, the vector canvas maps one to one onto the 480 by 360 stage. That makes it easy to size the gap. A gap of 140 pixels is just under 40 percent of the canvas height. Zoom out with the minus button to fit the full pipe length. Each pipe has to be long enough to reach past the stage edge when the gap sits at its highest or lowest point.
Name this costume gap 140. Duplicate it twice, move the pipes closer together, and name the copies gap 120 and gap 105 for the difficulty ramp in Step 6.
Spawning clones
The parent Pipe hides itself and runs one loop: create a clone, wait, repeat. Each clone runs the when I start as a clone script on its own.
when I receive [start game v]
hide
wait (1) seconds
repeat until <(game state) = [over]>
  create clone of (myself v)
  wait ((6.4) / (pipe speed)) seconds
end
The wait time keeps the pipes about 192 pixels apart at any speed. At a pipe speed of 4, the wait is 6.4 ÷ 4 = 1.6 seconds, and 4 × 30 × 1.6 = 192 pixels. If the speed rises to 6, the wait drops to about 1.07 seconds and the spacing stays the same.
Each clone picks a random y between -90 and 90. With a 140-pixel gap, the top of the gap can sit at 160 at most, which stays below the bird’s ceiling of 170.
Maker tip
Hide the original Pipe sprite and only ever show clones. A visible parent pipe stuck in the middle of the stage is a common reason pipes seem to “stop” after a few points. Forum users report that hiding it fixed everything.
Why you must “delete this clone” (the 300-clone limit)
Scratch caps a project at about 300 clones, and once you hit the cap, create clone silently does nothing. A pipe that never deletes itself stays in memory forever. At one pipe every 1.6 seconds, that’s about 37 new clones a minute, so you’d hit the cap in roughly 8 minutes of play, and sooner if old rounds pile up.
With deletion, only 3 or 4 pipes are alive at any moment. There’s one catch. Scratch’s “fencing” keeps a sliver of every sprite on stage, so a 60-pixel-wide pipe can never fully leave the left edge. Its centre stops at about -255. That’s why the clone deletes itself once x drops below -245 instead of waiting until it’s completely off-screen.
Did you know?
According to the awesome-llama guide to Scratch’s limitations, Scratch caps a project at about 300 clones. A Flappy Bird whose pipes never delete themselves will eventually stop spawning pipes at all.
Step 4: Collision, game over and restart
The game ends when the bird touches a pipe clone or falls below y = -165. When that happens, the bird sets game state to “over” and broadcasts game over. Every loop in the project runs repeat until game state = over, so everything freezes cleanly with no stop all.
Broadcast-based game states
Three broadcasts run the whole game:
- new round: the Stage resets the score and speed, sets
game stateto “playing” and clears old pipes. - start game: the bird, the pipe spawner and the difficulty loop all start.
- game over: loops end, the Game Over sign appears, the high score updates and the bird waits for a press to restart.
Setting game state to “playing” before you broadcast start game avoids a timing bug. If the bird’s loop checked the variable before it changed, it would see “over” from the last round and stop at once.
Stop pipes and the bird cleanly
Most tutorials, including 101computing’s 2019 version, end the game with stop all. That works, but it kills every script, so you have to click the green flag to play again. A broadcast-based restart is better. The bird waits for a fresh press of space or the mouse, then broadcasts new round.
The Stage uses broadcast (clear pipes) and wait before starting the round. “And wait” makes sure every old clone has deleted itself before the bird reappears at x = -100. Without it, the new bird can hit a leftover pipe and die instantly.
For the Game Over sign, paint a new sprite with the text “GAME OVER” and a line such as “Press space”. It hides on start game and shows on game over. You can switch to a game-over backdrop instead. A sprite is easier, though, because the frozen pipes stay visible behind it.
Step 5: Score and high score
Score a point when a pipe’s centre passes the bird’s x position, and make sure each pipe can only score once. The high score is a separate variable that you never reset when a round starts.
Count each pipe once
The usual bug is a check like “if x position < -100, change score by 1”. It stays true on every frame after the pipe passes, so the score jumps by dozens. The fix is a variable called scored, created on the Pipe sprite with For this sprite only ticked. That gives every clone its own copy. A clone sets it to 0 when it appears and to 1 after it scores.
if <<(x position) < (-100)> and <(scored) = (0)>> then
  set [scored v] to (1)
  change [score v] by (1)
end
If you create scored “For all sprites” by mistake, one clone’s flag blocks the others and points go missing. Delete the variable and create it again with the right option.
Keep a high score
When the game ends, the Stage compares the two values:
when I receive [game over v]
if <(score) > (high score)> then
  set [high score v] to (score)
end
The high score survives every restart in a session, because only score is reset on new round. To show both values, tick their checkboxes in the Variables category. Then right-click each monitor on the stage and choose large readout.
Signed-in Scratchers can store a high score in a cloud variable (marked with a cloud icon). That’s a later upgrade, because new accounts don’t get cloud variables straight away.
Step 6: Make it harder as you go
A difficulty ramp keeps good players interested. Tie the pipe speed to the score, shrink the gap at set scores, and add sounds for flaps and crashes.
Put the speed ramp on the Stage:
when I receive [start game v]
repeat until <(game state) = [over]>
  set [pipe speed v] to ((4) + ([floor v] of ((score) / (10))))
  if <(pipe speed) > (7)> then
    set [pipe speed v] to (7)
  end
end
Here is a worked example. At a score of 23, floor of 2.3 is 2, so the speed is 6 and pipes arrive every 1.07 seconds. The cap of 7 matters. Above that, a pipe needs only about 2 seconds to cross the screen, and most players can’t react in time.
The gap shrinks inside each new clone: gap 140 below 10 points, gap 120 from 10 to 24, and gap 105 from 25 on. Because each clone picks its costume when it appears, the change only shows up on new pipes. The pipe already on screen never changes under you.
The counter-argument is real: a ramp can make the game feel unfair to younger players. If you’re building for a class of 8-year-olds, try a fixed speed of 3 with a 150-pixel gap, and give them the ramp as a challenge to add themselves.
Full Flappy Bird Scratch code (copy-friendly text)
The scripts below are written in scratchblocks text, the format used on the Scratch forums and Scratch Wiki. Scratch can’t import text, so rebuild each script block by block, matching the colours and dropdowns. Variable names must match exactly.
Bird sprite
The bird runs four scripts. The physics loop and the flap script are in Step 2. Here are the other two.
when I receive [start game v]
switch costume to (parrot-a v)
repeat until <(game state) = [over]>
  next costume
  wait (0.15) seconds
end when I receive [game over v]
wait (0.5) seconds
wait until <not <<key (space v) pressed?> or <mouse down?>>>
wait until <<key (space v) pressed?> or <mouse down?>>
broadcast (new round v)
Pipe sprite
The Pipe has three costumes (gap 140, gap 120, gap 105) and a “For this sprite only” variable called scored. The spawner loop is in Step 3.
when flag clicked
hide when I receive [clear pipes v]
delete this clone when I start as a clone
if <(score) < (10)> then
  switch costume to (gap 140 v)
else
  if <(score) < (25)> then
    switch costume to (gap 120 v)
  else
    switch costume to (gap 105 v)
  end
end
go to x: (250) y: (pick random (-90) to (90))
set [scored v] to (0)
show
repeat until <(game state) = [over]>
  change x by ((0) - (pipe speed))
  if <<(x position) < (-100)> and <(scored) = (0)>> then
    set [scored v] to (1)
    change [score v] by (1)
  end
  if <(x position) < (-245)> then
    delete this clone
  end
end
delete this clone does nothing when the original sprite runs it, so the parent safely ignores clear pipes.
Stage / game-over
The Stage holds the settings and the round logic. The speed ramp and high-score scripts are in Steps 5 and 6.
when flag clicked
set [gravity v] to (-1)
set [flap strength v] to (8)
broadcast (new round v)

when I receive [new round v]
broadcast (clear pipes v) and wait
set [score v] to (0)
set [pipe speed v] to (4)
set [game state v] to [playing]
switch backdrop to (Blue Sky v)
broadcast (start game v)
The Game Over sprite runs three short scripts:
when flag clicked
hide when I receive [game over v]
go to x: (0) y: (0)
go to [front v] layer
show when I receive [start game v]
hide
To keep a copy, use File > Save to your computer. That downloads a .sb3 file, which you can open later with File > Load from your computer, in the browser or in the Scratch app.
Troubleshooting: why my Flappy Bird isn’t working
Most Flappy Bird bugs in Scratch come from four sources. A visible parent sprite, clones that never delete, a check that keeps firing, or an off-centre costume. Find your symptom below.
| Symptom | Likely cause | Fix |
|---|---|---|
| My pipes stop appearing after a few tries | Clones never delete, or old rounds’ clones pile up until the ~300 cap | Add delete this clone at x < -245 and clear pipes on every new round |
| Pipes stop at about three points | The visible parent Pipe sits mid-stage or the bird hits it | hide the parent on green flag; only clones show |
| Pipes multiply wildly | create clone of myself inside the clone script, so clones make clones |
Only the parent’s loop creates clones |
| Score goes up by more than 1 per pipe | The pass check stays true every frame | Use a “For this sprite only” scored flag |
| Bird dies when it isn’t touching the pipe | Off-centre costume, stray pixels, or mismatched centres on the two costumes | Centre both Parrot costumes and erase specks |
| Holding space makes the bird fly up forever | if key space pressed? then change y by 20 in a forever loop |
Use the flap script with a release check |
| Flaps lag or double up | when space key pressed hat plus keyboard auto-repeat |
Use key space pressed? in a loop |
| Bird falls too fast or jumps too high | Gravity too strong, no fall cap, or a wait in the physics loop |
Use the Classic tuning values; remove waits from the loop |
| Bird dies instantly after restarting | Old pipes still on stage when the bird reappears | Use broadcast (clear pipes) and wait before start game |
| Pipes bunch up at the left edge | Fencing stops them before the delete check fires | Delete at x < -245 rather than x < -240 |
| Game won’t restart without the green flag | stop all ended every script |
Use the game state variable and the new round broadcast |
| Blocks vanish while editing | Editor bugs reported after the April 2026 update | Save to your computer often, and reload if blocks disappear |
Maker upgrade: build a real flap button
A physical button turns your game into something you can set up at a school open day or a club stand. Both options below act as the space bar or a Scratch event, so your code barely changes.
| Controller | What you need | How it talks to Scratch | Setup time | Best for |
|---|---|---|---|---|
| Makey Makey | Makey Makey board, USB cable, 2 alligator clips, foil or playdough | Shows up as a USB keyboard and sends a space press | About 10 minutes | Ages 7 and up, events, no setup on locked laptops |
| BBC micro:bit | micro:bit V1 or V2, USB cable, 2×AAA battery pack, Bluetooth on the computer | Scratch Link plus the Scratch micro:bit extension over Bluetooth | About 20 minutes the first time | Wireless tap or tilt control, classrooms with micro:bits |
| Makey Makey + Code-a-Key Backpack | Makey Makey v1.5 or newer, micro:bit, backpack | The micro:bit triggers the Makey Makey’s key and mouse inputs over USB | About 20 minutes | Combining micro:bit sensors with plain keyboard input |
| Keyboard or mouse | Nothing extra | Built in | None | Everyday play |
Makey Makey flap pad
The Makey Makey closes a circuit through your body. Clip one alligator lead from the SPACE input on the front of the board to your flap pad. Clip a second lead from the EARTH strip along the bottom edge to something the player holds. Pressing the pad completes the circuit, and Scratch sees a space press.
| From | To | Purpose |
|---|---|---|
| Makey Makey SPACE input | Foil or playdough flap pad | Sends the space key when touched |
| Makey Makey EARTH strip | Foil wristband or a clip the player holds | Completes the circuit through the player |
| Makey Makey USB port | Computer USB port | Power and keyboard connection |
Playdough works well as a squishy flap button. The most common “it doesn’t work” moment is a player who isn’t touching Earth.
Power check
The Makey Makey runs only on USB power from your computer, at very low current. Never connect it, or any alligator lead, to a wall socket or mains-powered appliance.
micro:bit tilt-or-tap controller
To use a BBC micro:bit with Scratch, install Scratch Link and flash the Scratch micro:bit HEX file onto the board. The download arrives as a zip, so unzip it first. Then drag the .hex file onto the micro:bit drive. When it’s done, a five-character name scrolls across the LEDs. Keep Scratch Link running, then add the micro:bit extension from the button at the bottom left of the editor and connect.
Scratch Link needs Bluetooth and runs on Windows 10 (version 1709 or later), macOS 10.15 or later, ChromeOS and Android 6.0 or later. If you’ve never set up the board before, read a beginner’s guide to the BBC microbit first.
You don’t need a separate script. Add the micro:bit button to both press checks in the flap script, so it works alongside the keyboard:
wait until <<<key (space v) pressed?> or <mouse down?>> or <button (A v) pressed?>>
Change the release check the same way. Powered by its battery pack, the micro:bit becomes a wireless flapper. For a tilt version, use tilted (up v)? as the condition instead.
Which one to choose
Pick the Makey Makey if you want the fastest, most reliable setup. It needs no drivers or pairing, which helps on school laptops where you can’t install software. Pick the micro:bit if you already own one and want wireless play. Bluetooth can drop out, so test the connection before an event. The Code-a-Key Backpack only makes sense if you already have both boards. It works only with Makey Makey version 1.5 or later, and US retailers list it at about $25 to $28.
Flappy Bird in ScratchJr (ages 5 to 7)
You can make a simple Flappy Bird in ScratchJr, the free tablet app for ages 5 to 7. It won’t have real gravity or a score. ScratchJr has no variables, no random numbers and no clones, so the bird drifts down at a steady rate and a single pipe repeats.
- Add a bird character and a pipe character (draw a tall green rectangle in the paint editor).
- Bird, first script: Green Flag, then Repeat Forever around Move Down 1.
- Bird, second script: Start on Tap, then Move Up 2. Each tap lifts the bird.
- Bird, third script: Start on Bump, then Say “Ouch!”, then Go Home.
- Pipe: Green Flag, then Repeat Forever around Move Left 18 and Go Home, so the pipe keeps sliding across the screen.
- Use the Set Speed block on both characters to make the game easier or harder.
This version teaches cause and effect, events and loops, which is the right level for young children. When a child asks why the bird doesn’t speed up as it falls, it’s time to move to Scratch.
Playing and sharing Flappy Bird Scratch
Flappy Bird Scratch projects are free to play at scratch.mit.edu in any modern browser, and you can play your own .sb3 file offline in the Scratch app. To share, click Share on your project page, write instructions (“Space or click to flap”), and credit anyone whose art or code you remixed in the Notes and Credits box.
Searches for “flappy bird scratch unblocked” usually lead to unofficial mirror sites. These copy Scratch projects and wrap them in ads, and some push downloads you don’t want. If your school blocks scratch.mit.edu, the official options are to ask a teacher or the IT team to allow it, or to use the Scratch app where the school permits it. Network rules are your school’s decision, so work with them rather than around them.
The editor itself is changing. A block-editor update nicknamed “Spork” arrived in April 2026, and users reported bugs such as disappearing blocks in the months that followed. That’s a good reason to save a .sb3 copy as you go.
On April 7, 2026, the Scratch Foundation announced its Next-Generation Platform. It brings a refreshed site and Google sign-on, and it’s a step between Scratch 3.0 and Scratch 4.0. The Foundation hopes to release it by the end of 2026 and says Scratch will stay free. Scratch began at the MIT Media Lab’s Lifelong Kindergarten group, and the blocks in this guide should carry over unchanged.
Your next build can reuse almost everything here. Swap the Parrot for a rocket, turn the pipes into asteroids and the same velocity and clone code becomes a different game. Change the axis and the velocity code also gives you a platformer jump. Once that clicks, the stream of moving clones in this project is how most endless runners spawn their obstacles.
FAQ
How do you make Flappy Bird on Scratch?
Add a backdrop and the Parrot sprite at size 35. Give the bird a y velocity variable that gravity lowers every frame, and set it to 8 on each flap. Make a hidden Pipe sprite that clones pipe pairs at random heights. Finish with collision, a score and a broadcast-based restart. Expect 45 to 60 minutes.
How do you make gravity in Scratch Flappy Bird?
Each frame, change y velocity by -1, cap it at -12, then change y by (y velocity). That makes the bird accelerate as it falls, like the original. Avoid wait 0.1 plus change y by -15, which gives a constant, choppy drop.
How do you make pipes in Flappy Bird Scratch?
Draw a top and bottom pipe in one costume with the gap centred. Hide the parent sprite and clone it every 6.4 ÷ pipe speed seconds. Each clone starts at x 250 with a random y between -90 and 90, slides left, and deletes itself below x -245.
How do you add a score to Flappy Bird in Scratch?
Create a score variable for all sprites and a scored variable “For this sprite only” on the Pipe. When a clone’s x drops below the bird’s x (-100) and scored is 0, add 1 to score and set scored to 1.
Can I copy and paste Flappy Bird Scratch code?
You can’t paste text into Scratch. You can, however, rebuild the scripts from the text versions in this guide block by block. If you’re signed in, you can also drag scripts between projects with the Backpack at the bottom of the editor, or remix a shared project.
How do I download a Flappy Bird Scratch project?
Open the project in the editor and choose File > Save to your computer. That saves a .sb3 file. Open it later with File > Load from your computer, online or in the Scratch app.
Can you make Flappy Bird in ScratchJr?
Yes, as a simplified version. Tapping moves the bird up and a forever loop moves it down. A pipe slides left and returns home, and bumping ends the run. ScratchJr has no variables, random numbers or clones, so there’s no real gravity or score.
Where can I play Flappy Bird Scratch online for free?
On scratch.mit.edu. Search “flappy bird” and press the green flag on any shared project. Playing needs no account. Remixing and saving online need a free one.
Is Flappy Bird on Scratch unblocked at school?
That depends on your school’s network rules. Mirror sites advertised as “unblocked” are unofficial and often full of ads. Ask your teacher to allow scratch.mit.edu, or play a .sb3 file in the Scratch app if the school allows it.
How do I make the bird flap its wings in Scratch?
Use the Parrot’s two costumes. In a separate script, switch to parrot-a, then loop next costume and wait 0.15 seconds until the game ends. Centre both costumes first so the bird doesn’t jitter.
Notes on this article
- Fact-checked by Hugo Lindgren against the sources listed below before publication.
- Published
Fact-checking
- Researched from 8 sources, listed below.
- Every claim is checked by Hugo Lindgren; anything we cannot confirm is corrected, labelled or removed.
Sources (8)
- Discuss Scratch: stage size (scratch.mit.edu)
- Gandi: Scratch frame rate (getgandi.super.site)
- Limitations of Scratch (awesome-llama.github.io)
- Scratch Wiki: Scratch Update History (en.scratch-wiki.info)
- Discuss Scratch: Scratch changelog thread (scratch.mit.edu)
- Scratch Foundation: Coming Soon: Our Next-Generation Platform (scratchfoundation.org)
- Scratch Wiki: Next-Generation Platform (en.scratch-wiki.info)
- TVOvermind: Flappy Bird earnings (tvovermind.com)